Followers

Sunday, 10 February 2013

Using up my stash!

Hi all, well it's a pretty dreary day here and I am still recovering from some horrid flu type bug so am feeling a little fragile.  Anyway, I thought that i should probably start to use my mountains of craft stash rather than just keep adding to it!  My favourite thing is rubber stamping but I also have lots and lots of other paper crafting things that I have bought in the past thinking 'well I could use that', and 'oh I love that' and my favourite 'well it's too good a bargain not to buy' LOL. As a result I can barely move in 2 craft rooms and with all the other crafting things I do (knitting, sewing, painting plus a multitude of other things I have on my to do list) I really need to use some of it - plus I think my husband may divorce me if stuff piles up too much more!!
So I thought I would share a couple of small projects using some Tilda stuff that I have had for an age (although it was really hard as I just love the paper pad LOL).  The first thing is a card;


Different for me as there is absolutely no stamping, plus there is no matting and layering - just the papers which I edged with an alcohol marker.  I just love the floral brad in the corner (that was difficult using that - I really don't want to use the others I have now - what if I need them for something in the future and they're all gone????).  Anyway, I love these colours so thought I would do a little gift bag along the same lines;


Again no matting, just the edging with a marker.  I really liked these but they've been bought now so I won't get to keep them (am I the only one who finds it hard to part with the things they've made?  It's not that I think they're amazingly brilliant - I think it's just because I spend so much time on some projects that when they get given away, or sold etc it's hard to think that someone may just throw it away).

I hope you like my Tilda things - However, I still have mountains of stash to use so have lots to do!!

xxxx

Friday, 1 February 2013

New challenge at Ladybug Crafts

Hello folks :o)  Well can you believe it is February already!!  This year is going to go soooo fast!!  
Anyway the first of the month means a new challenge on my Ladybug Crafts store blog .

This month the challenge is;
Valentine's Day and/or Love.

I have made a card for a Valentine and I have used some fab Studio 490 stamps from the 'Art from the Heart' stamp plate;


I made the background by putting Radiant Rain colour concentrate in Egyptian Gold over some black card, I then dried it with the heat gun.  I then put it through my embossing machine with a stencil to emboss and then put versamark over the stencil to mark the pattern.  I removed the stencil and tipped on Ranger red tinsel embossing powder.  I heated this and ended up with a really rich red and gold background.  I stamped the heart with Flitter Glue and added gilding flakes (the colour I used was Morris Dance ).  I did this 8 times and then cut the hearts out.  I folded each one down the centre with the gilded pattern facing inwards.  I then started to stic  them together to make a sort of heart fan.  I cut out some Spellbinders shapes in black and gold mirror card and then stuck my heart fan on the top.  I stamped and embossed the sentiment which was from the same stamp set.  I wrapped some black ribbon around the front of the card and added a bow and some stick pins .  I then did the inside of the card to match.  My husband really loves this card (which is a pain as now he's seen it I can't use it as a Valentine's card LOL) and I hope you like it too.
Don't forget to pop over to Ladybug Crafts blog and take part in this months challenge ;o)

xxx

Thursday, 31 January 2013

Craft Us Crazy Challenge

Hello ;o)  
This post is a little late due to the
 Craft Us Crazy Challenge
running a bit late due to some power outage problemss - however, challenge 36 will be up and running very soon.  Anyway, onto the challenge;

Challenge #36
January 31 - February 13

Use your Cutting Machine and/or Favorite Technique


I have used my favourite techniques of distressing with ink and also watercolouring with distress inks;


I used two stamps from Kanban and stamped them in Brushed corduroy distress ink and then heat embossed with a holographic powder to give it a little sparkle.  I then used the same ink and lightly water coloured the image.  The papers I have used are from Papermania and they are inked around the edges with Brushed Corduroy ink to tie it all together.  I cut the image out with a nestie and layered it up on the papers.  The little clock charm is from Creative Expressions and the little foliage brad on the big bloomers is from the Idea-ology foliage range.  I added the beautiful thick and stripy ribbon and a couple of stick pins.  To finish I did the inside of the card to march (actually if I'm honest I did the inside of the card first which is what I always do LOL)  This is an 8 x 8 card and I have to say I was quite pleased with this one.  What do you think?
Don't forget to enter the Craft Us Crazy challenge (which will be up real soon I promise ;o))

xxx

Thursday, 17 January 2013

Valentine Craft Us Crazy challenge

Hello there ;o)  Well it's time again for the Craft Us Crazy challenge again!!  

Our challenge theme we have for you is VALENTINE's/LOVE and/or USE THE COLOR RED!!
For this challenge, we have a brand new sponsor.
DIGI DITTO

The winner will receive 5 stamps/images!
I have gone for red this week and also the love theme - hard to believe we're moving towards Valentine's Day.  So, here is my card;


The stamp is a large wooden one that I have had for ages - it came in a bag of end of line wooden stamps and I have never gotten around to using it before.  I stamped it and heat embossed with lava black cosmic shimmer powder so although black it has a gorgeous red sheen to it.  The papers are from a pile of papers that were also bought as a job lot - they are really pretty and I love the birds on the patterned paper.  I edged them with a Copic marker.  I added some spellbinders die cuts and made two peony type flowers with white tissue paper and sprayed them with luminart radiant rain in persimmon.  I rubbed a walnut stain distress pad over the tops once I had dried them.  The little hearts are made from lava black powder again melted in my melt pot and tipped into a little metal heart cutter.  I added a few faux stitches to finish and did the inside of the card to match.
Please join us over on the Craft Us Crazy blog for the challenge, we love looking at your fab entries ;o)

xxx

Friday, 11 January 2013

Birthday card for my husband

Hi everyone - well I have had an 'eventful' start to the New Year and I have to say I hope it hasn't set the tone for the whole year LOL.  One of our doggies was quite poorly over the New Year and so we have had a couple of trips to the vets and a hefty bill, then the central heating stopped working and we were without heat for a weekend (which isn't too bad when you consider some people have to live with no heat but I am spoilt and the cold makes my condition flare up!) and my husband has had toothache pretty much solidly since a trip to the dentist over a week a go but can't return until next week as they are waiting for an inlay to be made!!  So, hopefully that's the drama over for the whole year LOL

Anyway I thought I would share the card I made for Steve's birthday which was on the 23rd December as I was really quite pleased with it and he loved as he has an obsession with donkeys - he just loves them so I used a fab Meljen's designs digi which I've been saving for the occasion for ages;


The image is coloured with Copics and I added a little glossy accents to the eyes and the hearts.  I used papers from Dovecraft layered on Kraft cardstock and distressed (with my fab Zutter Distrezz-it-all, which I love) and inked all the edges.  The ribbon is from Creative Expressions and is just lush and in this brown it is just as suitable for a man's card.  The sentiment and bunting stamps are Anna Griffin and I heat embossed with pearlescent green powder and then cut out and inked the edges.  I added some drops of cocoa brown cosmic shimmer glue to the edges.  I did the inside to match but I haven't shown that here as I only got a chance to take a photo after I had written it so my scruffy scrawl would have ruined it somewhat LOL.
I just love this little donkey ;o)

xxx

Thursday, 3 January 2013

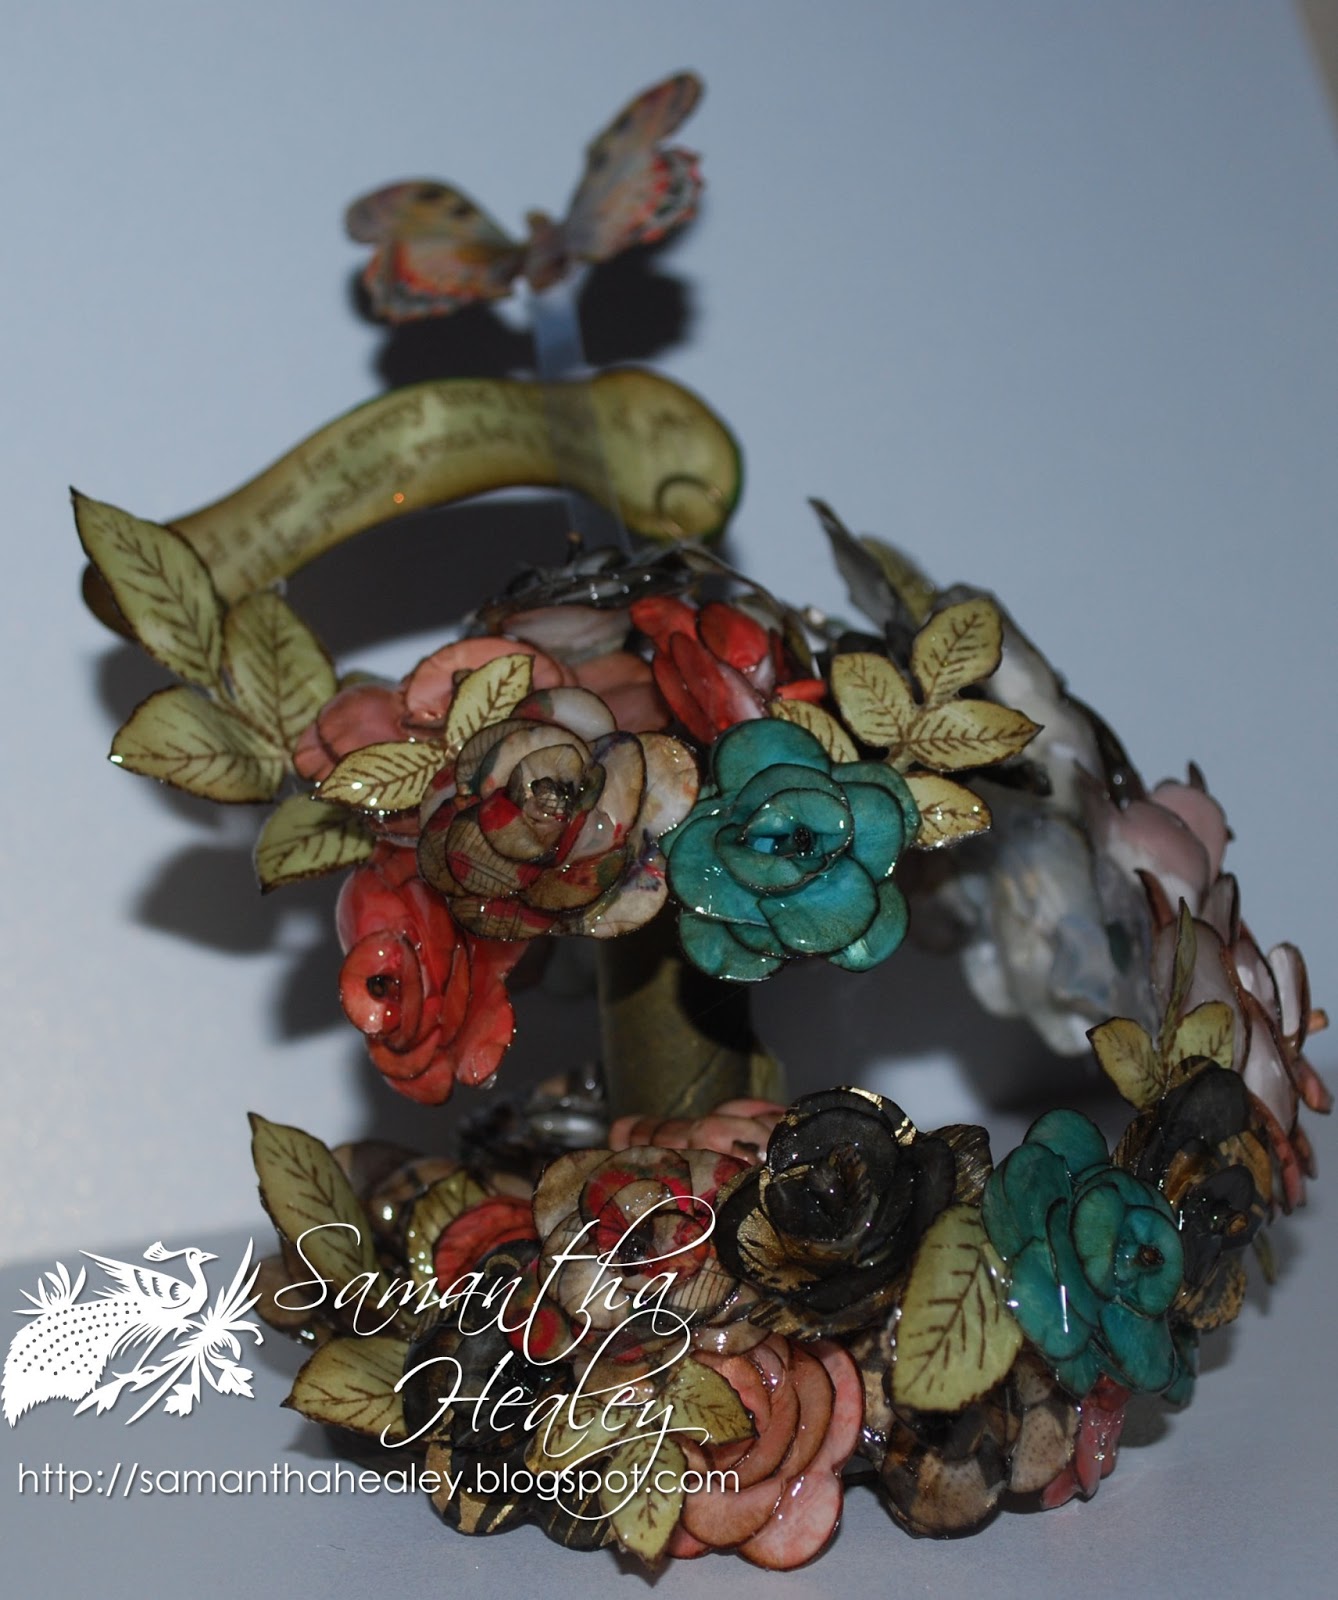
Faux Porcelain flowers

Hello, back again, but this time with my faux porcelain paper flowers that I have made into a little ornament ;o)  I have used them as my DT effort for my challenge blog; Ladybug Crafts

The flowers are made with papers from the Mariposa paper stack by DCWV, available HERE , and then they are dipped in UTEE.  I stamped some leaves and cut them out and diped in Utee as well.  I used a sentiment from Creative Expressions and some memo pins to support it.  I added a butterfly on a 'stalk' and piled them all up onto an Art Parts spool, available HERE .  They really do look like one of the old porcelain ornaments - what do you think?


I hope you like them

xxx

New Year , new challenge, Craft Us Crazy

Hi everyone - this is a very late post as I set a post to schedule and not only did it not post but the whole post disappeared LOL  (I expect I pressed a duff button so entirely my fault!!)
Anyway, it is 2013 and we have the first challenge of the new year from Craft Us Crazy .

Our challenge theme we have for you is SOMETHING NEW and/or WORK WITH OUR INSPIRATION PHOTO BELOW!!
Use this photo to inspire your project in anyway that inspires YOU!! It can be one of the many images in the photo, the colors, the theme..whatever YOU feel!!!
For this challenge, we have a brand new sponsor. A dear friend of mine who is a wizard on the sewing machine!!!
Who is this wizard on the sewing machine?? Lets see!!!

Not only are we drawing inspiration from the picture above, but our prize for you this week is made with the fabric in the picture!!!! Below is a SAMPLE ONLY of the tote bag you will receive if you're the lucky winner!!

It measures 14" across and 16" top to bottom ( not including handles)
It is fully lined ( No Raw Edges)
Stabilized with a soft padded feel to help protect your items.
tote bag handles. ( Not fabric to make it even more durable)
Top stitching to secure the tote bag handles in place and to give the tote a finished look

I haven't done anything papercraft this time, but something with my sewing machine which seems to be getting a lot of use at the moment!!  I drew inspiration from the fabulous Debbie Shore who I watched make something similar on her Thimble Lane You Tube site (she is very talented with a sewing machine so is worth checking out if you're into stitching ;o)
So, here is my fancy pin cushion;


I hope you like it ;o)  I'll be back soon with some faux porcelain paper flowers.

xxx